- Download CUPS driver from Toshiba web site:
wget http://www.eid.toshiba.com.au/drivers/eBX/eBX_CUPS_Colour_V7.13.zip
- Extract and install the driver (as root/sudo):
unzip eBX_CUPS_Colour_V7.13.zip
cp eBX_CUPS_Colour_V7.13/normal/TOSHIBA_ColorMFP_CUPS.tar /tmp/
rm -fr eBX_CUPS_Colour_V7.13
cd /; sudo tar -xvf /tmp/TOSHIBA_ColorMFP_CUPS.tar
- Extract and rename the ppd file:
cp /usr/share/cups/model/Toshiba/TOSHIBA_ColorMFP_CUPS.gz ~/Downloads
cd ~/Downloads; gunzip ~/Downloads/TOSHIBA_ColorMFP_CUPS.gz; mv ~/Downloads/TOSHIBA_ColorMFP_CUPS ~/Downloads/TOSHIBA_ColorMFP_CUPS.ppd
- Install system-config-printer (if not installed yet):
sudo yum install system-config-printer
- Go to system menu: System -> Administration -> Printing, then New Printer
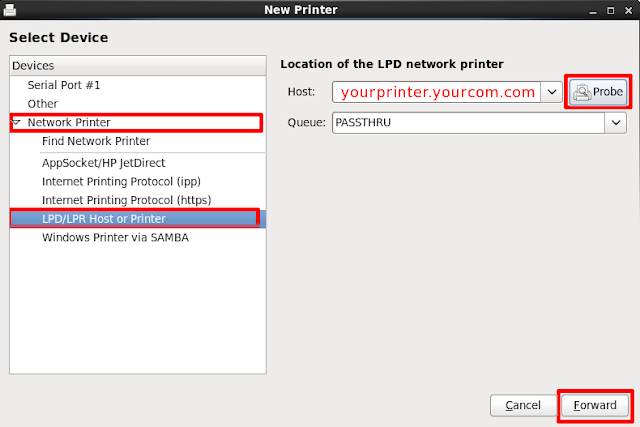
- Select Network Printer, then LPD/LPR Host or Printer, type your printer host/ip address then click Probe button, when the Queue is detected, click Forward button.
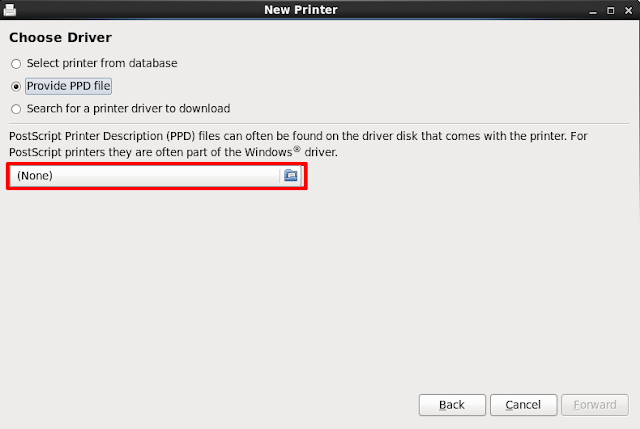
- Select Provide PPD file and select the PPD file:
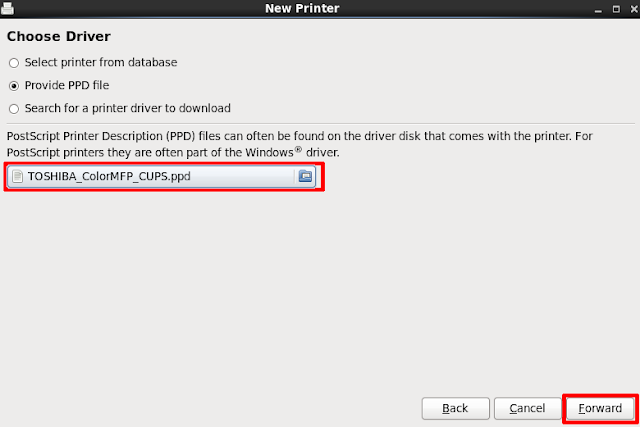
- Select the TOSHIBA_ColorMFP_CUPS.ppd file:

- Click Forward button to proceed:
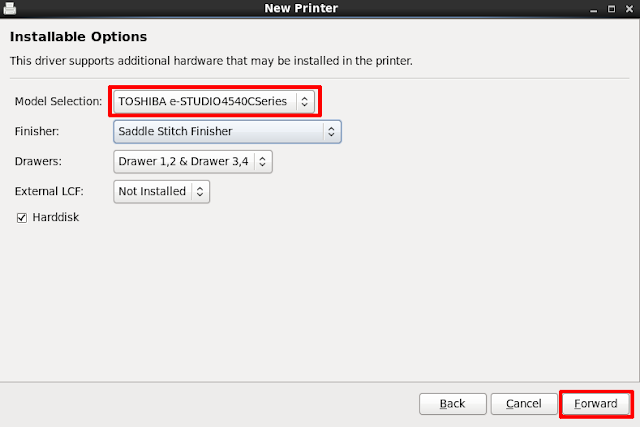
- Set Model Selection to TOSHIBA e-STUDIO4540CSeries and click Forward:
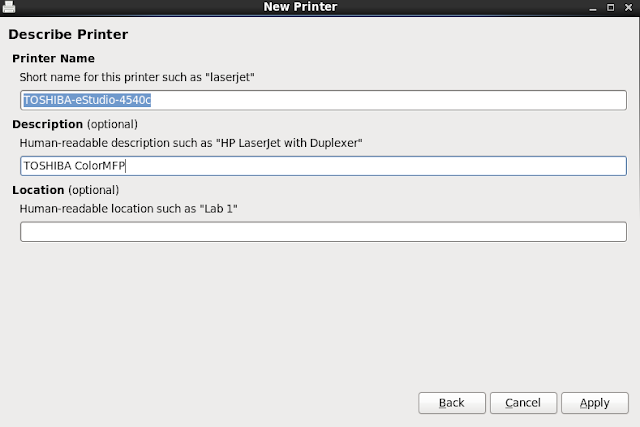
- Set Printer name, description and location information, and click Apply button:


No comments:
Post a Comment